How to Verify Your List on Three Major Email Service Providers

Email list verification — It’s not sexy, but it’s 100% necessary. In this post we’ll explore what it is, why it’s so vital to your email marketing success and how to actually do it on three major email service providers. Let’s get started!
What Is Email List Verification?
If you’re unfamiliar with the term, email list verification is simply the act of validating the email addresses on your list and making sure they’re still in use. Studies show that the average email list decays by 25% every year due to subscribers changing occupations, email providers and so on. If you don’t frequently verify your subscriber list, there’s a good chance you’re messaging “dead” addresses and your email marketing efforts are suffering because of it.
In recent years, most email service providers have made strides to block people from emailing inactive accounts by creating sophisticated algorithms which predict the bounce and abuse rate of every new email address added to a list. MailChimp’s version is called Omnivore and while not all ESPs have gone as far as naming their own version of the security measure, they all have filters in place to prevent spam and maintain a high sender score.
Why Is Email List Verification Important?

There are five main reasons why email list verification is important:
- To improve or maintain your sender reputation. Consistently mailing to dead addresses will cause your open and click-through rates to plummet, which, in turn, will damage your sender score and email reputation. Marketers with poor email reputations will often see extremely low levels of success with their email marketing campaigns because most of their messages will end up in either the promotions or spam folder of their subscribers inboxes. Repeated mailings to a large number of dead addresses can even lead to your account being blacklisted.
- To limit your expenses. The more subscribers you have, the more your ESP will charge you each month to use their service. And while email is an incredibly cost effective marketing tool, there’s no reason to pay more money than you have to; especially if you’re paying elevated sums to message a list of bad email addresses.
- To increase your revenue. By emailing your subscribers consistently and keeping them engaged, you’ll maintain a healthy sender score and give yourself the chance to experience the incredible ROI email marketing is known for. But you can’t do that if your messages never reach the right people.
- To improve the quality of your marketing data. Effective marketing relies on accurate data and one of the best ways to get this data is by conducting A/B tests. Unfortunately, A/B tests are ineffective when used on lists that haven’t been verified. Why? Because all your results will be skewed. Were your low open rates due to ineffective headlines or because you emailed a bunch of inactive accounts? It’s impossible to know for sure.
- It’s not very difficult. And finally, verifying your email list is actually quite simple. We’ll spend the rest of this post exploring how to validate every address on your email list in each of three major ESPs: MailChimp, Aweber and GetResponse.
As a quick side note, it’s important to first attempt to re-engage inactive subscribers before you set about verifying your email list and unsubscribing members. If they remain unresponsive after you’ve made the effort to reconnect, it’s time to say goodbye.
How to Verify Your List

Now that we’ve established what email list verification is and why it’s so important, let’s go over how to actually do it on three major email service providers.
MailChimp
MailChimp offers a couple of different ways to clean your list, but, for this article, we’ll focus on unsubscribing inactive subscribers by their “campaign activity.”
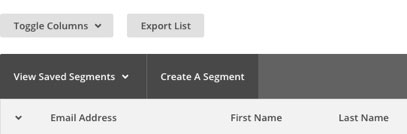
- Locate the “Lists” page inside your MailChimp account and pick the name of the list you plan to work with. Now choose “Create A Segment.”
![]()
- In the “Contacts Match” drop down menu, select “All.” Now it’s time to choose your conditions. In the three drop down menus, choose “Campaign Activity” for the first, “Did Not Open” for the second, and then select your prefered amount of time.
![]()
- If you’re worried about unsubscribing brand new subscribers before they’ve had a chance to interact with your content, select “Add” to create a new condition. In the following drop down menus, select “Date Added,” “Is Before,” and your preferred date.
- Once you have the conditions set, click “Preview Segment.”
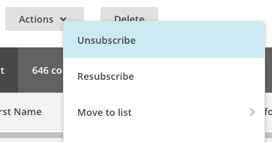
- From the “Actions” drop down menu, select “Unsubscribe” and click “Confirm” on the confirmation popup.
![]()

Aweber
The process for cleaning your list in Aweber is similar to what we just described for MailChimp.
- Locate the “Subscribers” tab and click “Manage Subscribers” from the drop down menu.
![]()
- On the following screen, set the two available drop down menus to “No Opens” and “Since” and type a specific date into the blank box. By doing this, you’re selecting every subscriber on your list who hasn’t opened one of your emails since the specific date you entered into the blank box.
- Click the green + button to add an additional parameter. Then select “Date Added” from the first drop down menu, “Date is Before” from the second, and enter the same date as you did previously into the following blank box. This allows you to keep from unsubscribing brand new list members who may have not had a chance to interact with your content yet. Now click the “Search” button.
![]()
- Aweber will now display all the addresses on your list who haven’t engaged with any of your emails since the specific date you entered, while excluding any brand new subscribers. To delete these subscribers from your list, select each name and click “Delete” to remove them from your list.


GetResponse
While MailChimp and Aweber have similar processes for cleaning email lists, GetResponse handles things a bit differently.
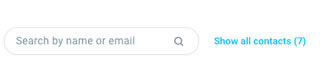
- In the upper navigation bar, select “Contacts” and then click “Show all Contacts.”
![]()
- On the following screen, click “Advanced Search” located beneath the search bar.
![]()
- For the parameters, choose “All Selected Lists,” “Any Autoresponder Setting,” and “Subscribed At Any Time” in the three dropdown menus.
![]()
- Now click “Add Condition” and select “Contact Actions,” “Message Not Opened,” “All,” and “Since” in the four following drop down menus and enter a specific date into the open box. Then hit “Apply.”
![]()
- In order to keep brand new subscribers, add another condition and select “Contact Details,” “Subscription Date,” “Is Before,” and a desired date in the following menus. When you’ve set the appropriate parameters, click “Apply.”
![]()
- Each subscriber that meets the specified criteria will now appear below. At the top of the list, select the box to choose every name. Then click the “Actions” link and hit “Unsubscribe.” In the confirmation popup window, click the “Yes, Unsubscribe” button.


Are There Other Options?
And that’s all there is to removing dead addresses from your email list inside MailChimp, Aweber and GetResponse. But we would be remiss not to mention another, more accurate way to clean your list: using a specific list cleaning service such as the one we provide at Email List Verify.
Our software uses advanced techniques like email deduplication, spam-trap removal and risk validation to accurately scrub inactive and dead addresses from your list, improve your email reputation and help ensure you’re getting the most bang for your buck with email marketing.
Try our service for free and then select a plan that best fits your needs and budget. For $4, you can verify up to 1000 names and prices only shrink from that point on.
Email list verification isn’t glamorous, but it’s essential to the effectiveness of your email marketing efforts. It’s also pretty simple so don’t push it off any longer. If you happen to be short on time, resistant to technology, or just want the utmost accuracy, use a service like ours to verify your list quickly and easily.